Water Tank Prep: Filter Installation & Hardness Test Guide
How to install Breville water filter: soaking, dating, and testing water hardness. Complete guide for optimal espresso extraction and machine longevity.
Water is one of the essential ingredients in making great tasting coffee, yet many home baristas overlook its importance. When you invest in a quality espresso machine like a Breville, the water you use directly impacts both the taste and texture of your espresso.
For the first three months of owning my Breville, I used straight tap water without the filter. My shots tasted fine—or so I thought. Then I installed the filter and tested my water hardness. The difference was subtle but real: cleaner flavors, less chalkiness, and my descale light stopped coming on every few weeks. I’ve been religious about water quality ever since.
Poor water quality can lead to mineral buildup inside your machine, affecting heating elements and group heads while simultaneously diminishing the clarity of flavors in your shot. This guide covers everything you need to know about Breville water filter installation and water hardness testing.
Why Water Quality Matters for Espresso
Hard water—water with high mineral content—poses particular challenges for espresso machines:
- Accelerates scale buildup inside the thermocoil and boiler
- Reduces machine lifespan by clogging internal components
- Creates a chalky or flat taste in your espresso
- Affects heating efficiency leading to temperature inconsistency
Conversely, water that’s too soft lacks the minerals needed to extract optimal flavors from your coffee grounds. The ideal water for espresso falls in a sweet spot: enough minerals for flavor extraction, but not so many that scale becomes a problem.
This is why understanding your water hardness and using appropriate filtration isn’t just a maintenance task—it’s a critical component of espresso quality.
Understanding Water Hardness
Water hardness is measured by the concentration of dissolved minerals, primarily calcium and magnesium. These measurements are typically expressed in:
- PPM (Parts Per Million) - Most common in the US
- German Degrees (°dH) - Common in Europe
- Grains Per Gallon (GPG) - Sometimes used in US
| Hardness Level | PPM Range | Description |
|---|---|---|
| Soft | 0-60 | May lack extraction minerals |
| Moderately Hard | 61-120 | Ideal for espresso |
| Hard | 121-180 | Requires filtration |
| Very Hard | 180+ | Aggressive filtration needed |
Testing Water Hardness with Included Strips
Most Breville espresso machines include water hardness test strips in their accessory kit. These simple but effective tools help you determine your home’s water mineral content.
How to Use Water Hardness Test Strips
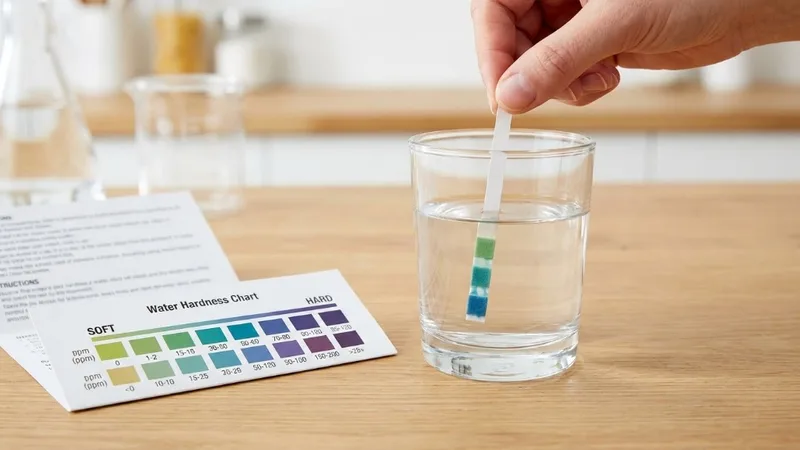
The process is straightforward and takes less than a minute:
-
Fill a clean glass with tap water from the source you’ll use in your machine (typically your kitchen tap)
-
Dip the test strip into the water for 1-2 seconds, ensuring the reactive pads make contact with the water
-
Remove and wait 30-60 seconds for the color to fully develop
-
Compare to the scale printed on the test strip packaging, which shows color gradations corresponding to hardness levels
-
Note your reading for programming into your machine
Most Breville test strips classify water hardness into four categories, which correspond directly to the machine’s programmable settings.
Interpreting Your Results
| Strip Color | Hardness Level | Machine Setting |
|---|---|---|
| Light/No color | Soft (1) | Level 1 |
| Light pink | Moderate (2) | Level 2 |
| Medium pink | Hard (3) | Level 3 |
| Dark pink/red | Very Hard (4) | Level 4 |
Programming the Hardness Setting on Your Machine
After testing your water, you need to program this information into your Breville machine. This setting determines when the machine will alert you to descale.
Step-by-Step Programming
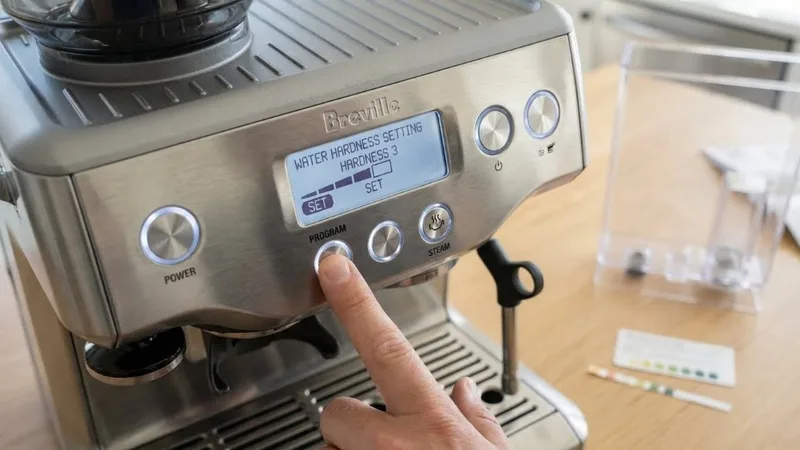
- Turn on your machine and wait for it to heat up
- Press and hold the PROGRAM button for 3-5 seconds
- The current hardness setting will flash on the display (or indicated by button lights)
- Use the 1-cup or 2-cup buttons to adjust the level (1-4)
- Press PROGRAM again to confirm and save
Why does this matter? If you set the hardness too low, your machine will remind you to descale more often than necessary. Set it too high, and you risk scale buildup before the alert triggers. Accurate programming keeps your machine running optimally.
Step-by-Step Water Filter Installation
The Breville water filter is a charcoal-based cartridge that removes chlorine, sediment, and some minerals from your water. Here’s the complete installation process:
What You’ll Need
- New Breville water filter (OEM or compatible)
- Clean bowl or container for soaking
- Fresh cold water
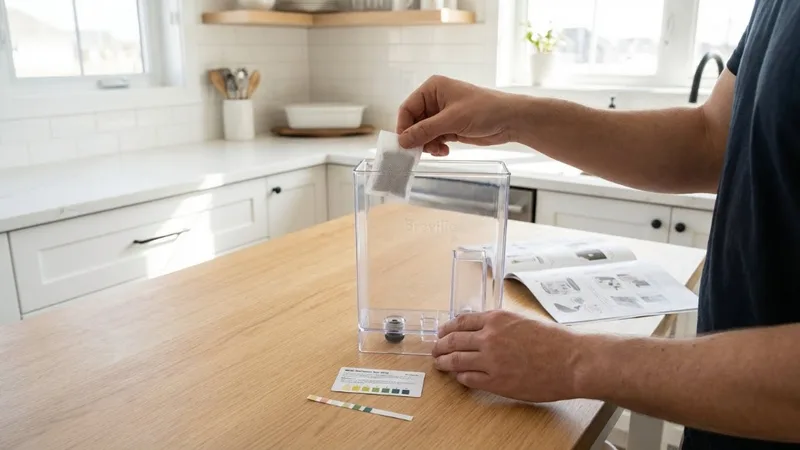
Step 1: Prepare the Filter (Crucial!)
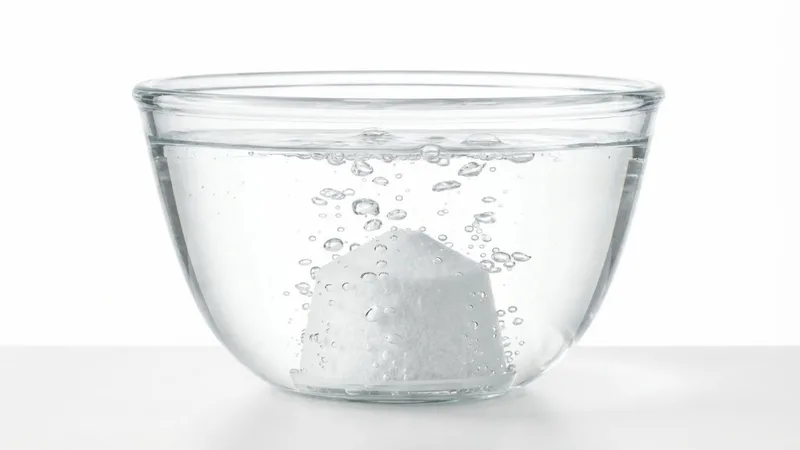
This step is often skipped, but it’s essential:
- Remove the new filter from its packaging
- Fill a bowl with cold water
- Submerge the filter completely for 5 minutes
- Gently shake the filter underwater to release any carbon particles
- This removes loose carbon dust and saturates the filter media
Skipping this step can result in black carbon particles in your first few shots and reduced filter effectiveness.
Step 2: Set the Date Dial
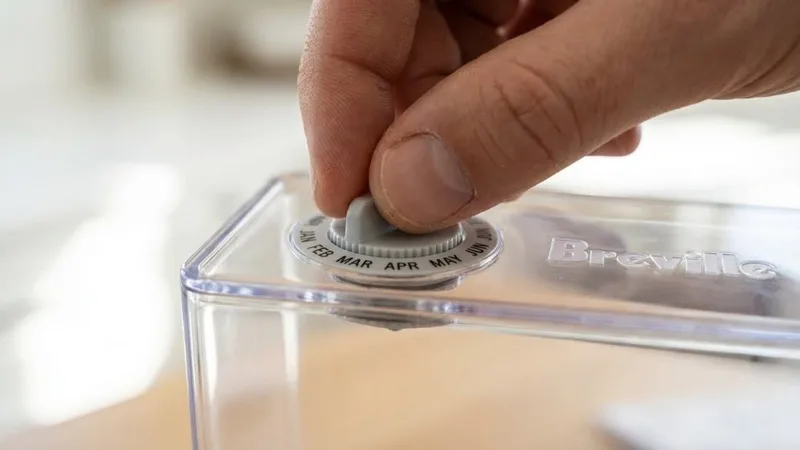
Most Breville filters have a date dial on top:
- Locate the rotating dial on the filter cap
- Turn it to display the current month
- This helps you track when replacement is due (2 months from installation)
- Some users set it to the replacement month instead—choose what works for you
Step 3: Install the Filter Holder
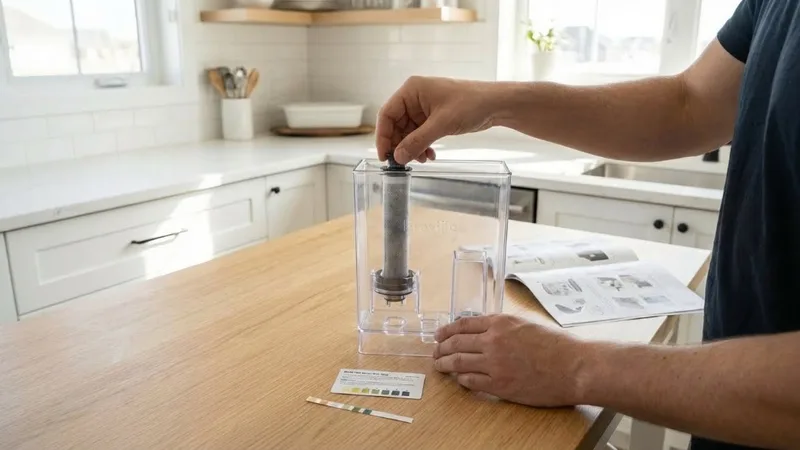
- Remove the water tank from your machine
- Empty any remaining water
- Locate the filter holder base at the bottom of the tank
- Insert the soaked filter into the holder, pressing firmly until it clicks
- Ensure the filter sits level and secure
Step 4: Fill and Install the Tank
- Fill the tank with fresh, cold water to the MAX line
- Slide the tank back into the machine
- Press firmly until you hear/feel it click into place
- The machine may detect the new filter and reset its counter
Step 5: Prime the Filter
Before making espresso:
- Lock an empty portafilter into the group head
- Place a container under the portafilter
- Run the hot water/espresso button for 10-15 seconds
- This flushes any remaining carbon particles
- Discard this water
Your filter is now installed and ready!
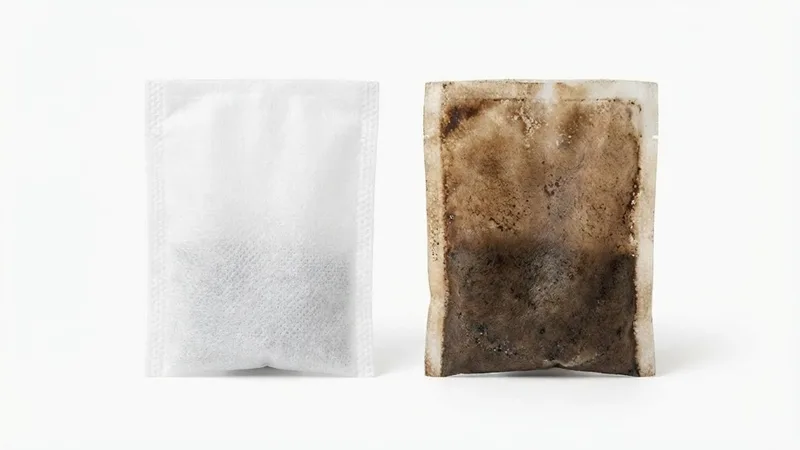
When to Replace Your Water Filter
Breville recommends replacing the water filter:
- Every 2-3 months with regular use
- After approximately 50-70 liters of water
- When you notice decreased water flow
- If your espresso starts tasting flat or off
- When the descale alert appears sooner than expected
Signs Your Filter Needs Replacement
| Symptom | Likely Cause |
|---|---|
| Slow water flow from group head | Clogged filter |
| Chlorine taste returning | Filter exhausted |
| Descale alert more frequent | Minerals bypassing filter |
| Black particles in water | Filter degrading |
Pro Tip: Set a calendar reminder for 2 months after installation. It’s easier than tracking water volume.
Generic vs OEM Breville Filters: Which Should You Choose?
This is a common question among Breville owners looking to save money on consumables.
OEM Breville Filters
Pros:
- Guaranteed compatibility with your machine
- Consistent quality control
- Designed specifically for Breville’s water systems
- May maintain warranty coverage
Cons:
- Higher price point ($15-25 for 6-pack)
- Only available from authorized retailers
Generic/Third-Party Filters
Pros:
- Significant cost savings (often 50-70% cheaper)
- Widely available on Amazon and other retailers
- Many work perfectly fine
Cons:
- Quality varies between manufacturers
- Some may not fit properly
- Potentially different filtration capacity
- May not remove the same contaminants
Our Recommendation
Start with OEM filters for your first year of ownership. This ensures you learn what “normal” performance feels like. After that, if budget is a concern, try a well-reviewed generic option and compare. If you notice decreased flavor quality or faster scale buildup, switch back to OEM.
Troubleshooting Water Filter Issues
Problem: Water Flow is Very Slow
Causes:
- Filter installed incorrectly
- Filter not soaked before installation
- Filter is clogged and needs replacement
- Air trapped in the system
Solutions:
- Remove and reinstall the filter, ensuring proper seating
- If new, soak the filter longer (10 minutes)
- Replace with a fresh filter
- Prime the system by running water through
Problem: Black Particles in Water or Espresso
Causes:
- Filter wasn’t soaked before installation
- Filter is deteriorating
- Carbon dust not flushed after installation
Solutions:
- Run 20-30 seconds of water through the group head
- If persistent, remove filter and soak for 10 minutes, shaking gently
- Replace filter if the problem continues
Problem: Chlorine Taste Still Present
Causes:
- Filter exhausted and needs replacement
- Filter installed incorrectly (water bypassing)
- Very high chlorine levels in source water
Solutions:
- Check filter is seated properly in holder
- Replace with new filter
- Consider additional filtration (pitcher filter or under-sink system)
Problem: Machine Shows Descale Alert Frequently
Causes:
- Water hardness setting programmed incorrectly
- Filter not effectively reducing minerals
- Very hard source water overwhelming filter capacity
Solutions:
- Re-test water hardness and reprogram machine
- Replace filter more frequently (every 6 weeks instead of 8)
- Consider using filtered or bottled water in hard water areas
FAQs
Do I really need to use a water filter?
If you have soft water (under 60 ppm), you may not strictly need one, though the filter still removes chlorine which affects taste. For moderate to hard water, it’s highly recommended to protect your machine and improve espresso quality.
Can I use filtered water from a pitcher instead?
Yes! Brita, ZeroWater, or similar pitcher filters work well. You can then skip the Breville filter entirely. However, be aware that some filters (like ZeroWater) remove nearly all minerals, which can affect extraction. Moderate filtration is usually best.
How do I know if my filter is actually working?
Compare the taste of filtered water from your machine to unfiltered tap water. You should notice reduced chlorine smell/taste and smoother mouthfeel. You can also use test strips before and after to measure mineral reduction.
Does the water hardness setting affect filter life?
Not directly, but accurate hardness settings ensure your descale alerts are meaningful. The filter removes some minerals, so your effective hardness is lower than tested tap water.
Can I run the machine without a filter installed?
Yes, but only if you use soft or already-filtered water. Running hard water without a filter will accelerate scale buildup significantly.
Key Takeaways
- Test your water hardness using included test strips before first use
- Program the correct hardness level (1-4) into your machine for accurate descale alerts
- Always soak new filters for 5 minutes before installation
- Set the date dial to track replacement timing (every 2 months)
- Prime new filters by running water through to flush carbon dust
- Replace on schedule—even if espresso tastes fine, filter capacity diminishes
- OEM filters are worth it initially; try generics later if budget is a concern
- Water quality is the invisible foundation of great espresso
Proper water management may not be glamorous, but it’s essential for machine longevity and espresso excellence. Take the 10 minutes to set this up correctly, and your Breville will reward you with years of delicious coffee.
Related Guides:
Mikael
Home espresso enthusiast and Breville specialist. Helping you master the art of coffee brewing from your own kitchen.
Learn more about me →