Fix Breville High Pressure
Fix Breville pressure gauge too high with grind size, dose, and OPV adjustments. Complete troubleshooting guide for over-extracted or choking espresso.
Got a Breville pressure too high issue? Yeah, I’ve been there more times than I want to admit. Just last month, I watched my gauge spike way past the espresso zone while the portafilter just… dripped. Barely anything coming out. The shot tasted like burnt rubber mixed with regret.
That spike on your gauge means over-extraction or “choking”—basically, the puck is fighting back against the water so hard that you end up extracting all the nasty bitter compounds and none of the good stuff. Let me walk you through everything I’ve learned fixing this on my own machine, from the obvious culprits like grind size to the more advanced OPV tweaks most guides won’t tell you about.
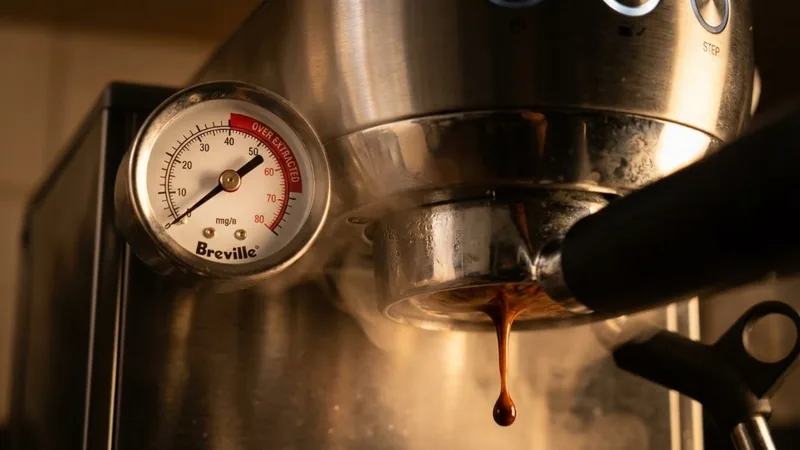
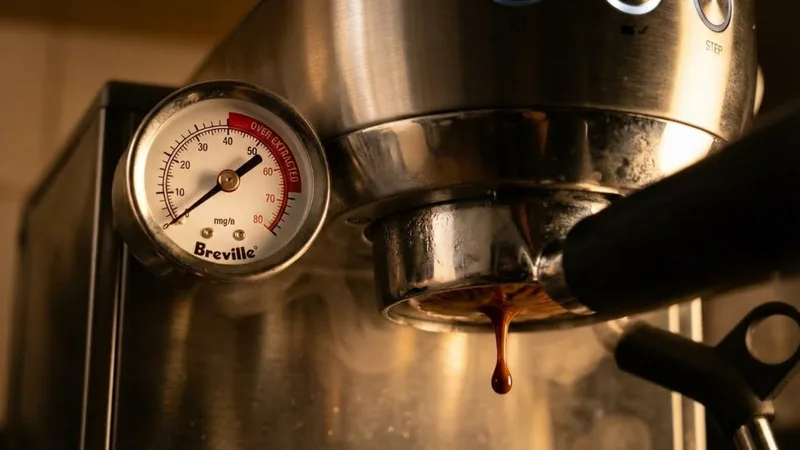
What High Pressure Looks Like on the Gauge
If you’re running a Barista Express or similar Breville, that pressure gauge becomes your best friend (or worst enemy). The sweet spot—that gray espresso zone—hovers around 9 bars. That’s where the magic happens: balanced, smooth, actually enjoyable coffee.
Normal vs High Pressure
| Reading | Gauge Position | What It Means |
|---|---|---|
| Normal | Middle zone (9-10 bar) | Proper extraction |
| High | Right zone (11+ bar) | Too much resistance |
| Maxed | Far right/red | Choking - puck is blocked |
Visual Signs of High Pressure
Here’s what I typically see when pressure runs high:
- First drips show up after 10+ seconds—feels like waiting forever during pre-infusion
- Slow “mouse tail” drip that barely moves, or the flow stalls completely
- Gauge shoots up fast and stays pinned to the right
- 35+ seconds pass and you’ve got maybe an ounce of liquid
- Crema is either super dark or basically nonexistent
Quick tip I learned the hard way: hold down that shot button continuously. If you let the pump cycle on and off, the gauge jumps around and you can’t get an accurate reading. Took me embarrassingly long to figure that one out.
Signs of Over-Extraction and Choking
When your pressure runs high, you’re pulling out stuff that should’ve stayed in the coffee. The result? A shot that makes you question your life choices.
Taste Profile
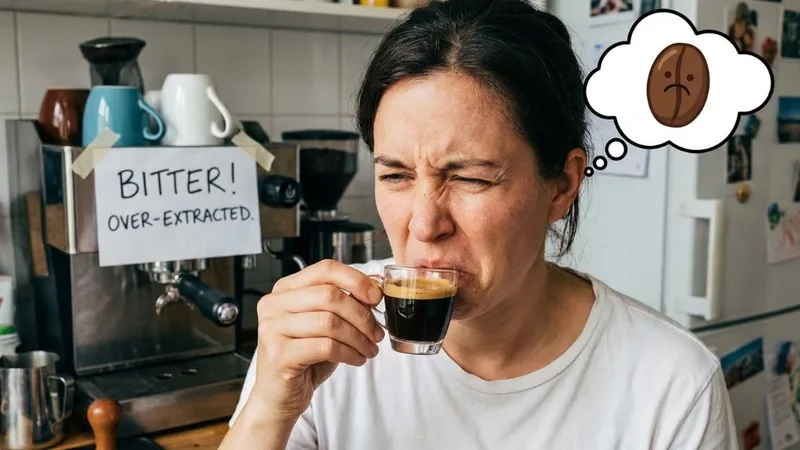
I remember my first really over-extracted shot. Took a sip and immediately thought something was wrong with the beans. Nope—just my technique. Here’s what over-extraction tastes like:
- Bitter—not the pleasant dark chocolate bitter, more like chewing on aspirin
- Astringent—that weird dry, puckering feeling that sticks around
- Burnt or ashy—like someone put out a campfire in your cup
- Hollow—hits hard at first, then nothing. No finish whatsoever
- Zero sweetness—all the bad stuff, none of the caramel or fruit notes you’re chasing
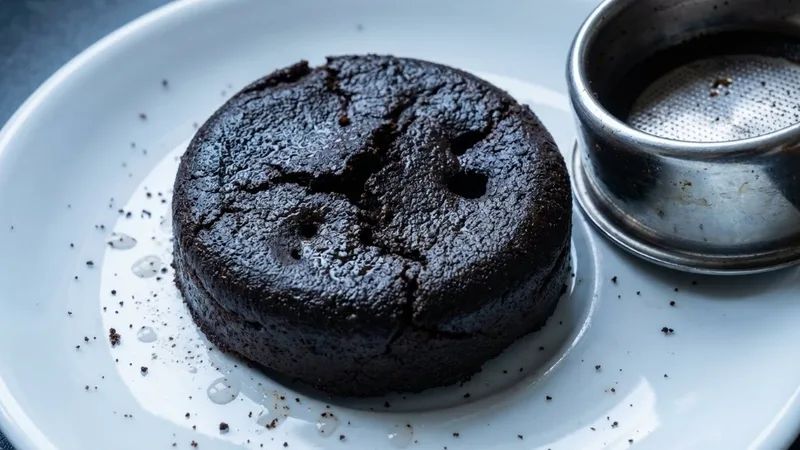
Visual Indicators
| Sign | What You See |
|---|---|
| Flow rate | Dripping, not flowing |
| Color | Dark, almost black |
| Crema | Very dark or absent |
| Time | 35+ seconds for small yield |
| Puck after | Dry, muddy, or “puck soup” |
The Choking Point
When things get really bad, the machine straight up chokes. I had this happen with a super fresh Ethiopian I was too eager to try—ground way too fine, packed too much in. The pump was straining so loud my wife asked if the machine was dying. Almost nothing came out, gauge buried in the red zone. Total nightmare.
Sound familiar? Let’s fix it.
Common Causes of High Pressure
Here’s the thing—there’s almost always a simple reason for high pressure. Let me break down what’s probably going on with your setup:
1. Grind Size Too Fine
Nine times out of ten, this is your problem. I know because it’s usually mine. Those finely ground particles pack so tight that water can barely squeeze through.
| Problem | Breville Dial Position | Solution |
|---|---|---|
| Way too fine | 1-3 | Move to 5-6 |
| Too fine | 4-5 | Move to 6-7 |
| Just a bit fine | 6 | Move to 7 |
Don’t go crazy with adjustments though. I usually move one click at a time while the grinder’s running (never adjust when it’s static—you’ll damage the burrs, and I’ve seen what that repair costs). Give each change 2-3 shots before deciding if you need more.
2. Dose Too High
More coffee sounds like a good idea until you realize it creates a taller, denser puck that water just can’t get through efficiently.
What you should be using:
- Single basket: 7-9g
- Double basket: 16-18g
If you’re cramming 19-20g in there like I used to, try dropping to 17-18g. That extra gram or two makes a surprising difference. I was shocked the first time I actually weighed my dose and realized I was overdosing by almost 3 grams.
3. Tamping Too Hard
Look, I get it. Tamping hard feels productive. Like you’re really doing something. But smashing that coffee into oblivion just creates more resistance than you need.
What actually works:
- Firm but not aggressive pressure (roughly 30 lbs, but honestly don’t obsess over the number)
- Keep your tamper level—this matters way more than force
- Don’t press with your entire body weight
- The grind creates most of the resistance anyway
4. Poor Puck Prep / Channeling
Uneven distribution messes everything up. Water finds the path of least resistance, builds up pressure against the dense spots, then suddenly bursts through—you’ll see the gauge spike, then the shot gushes in one area.
What I do now:
- WDT (Weiss Distribution Technique) with thin needles before every shot
- Level the grounds before reaching for the tamper
- No tapping the portafilter after tamping (this creates gaps at the edges)
5. Very Fresh Beans (Under 3 Days)
So you just got beans roasted yesterday and can’t wait to try them. I’ve been there. Ran them through my machine immediately and couldn’t figure out why everything was choking. Turns out, fresh beans are still releasing CO2 like crazy, and that gas creates extra resistance.
What to do:
- Let beans rest at least 5-7 days after roasting
- If you absolutely can’t wait, grind noticeably coarser than usual
- Accept that the first few shots won’t be perfect
Step-by-Step Troubleshooting
Alright, let’s actually fix this. Here’s the order I go through when my pressure runs high:
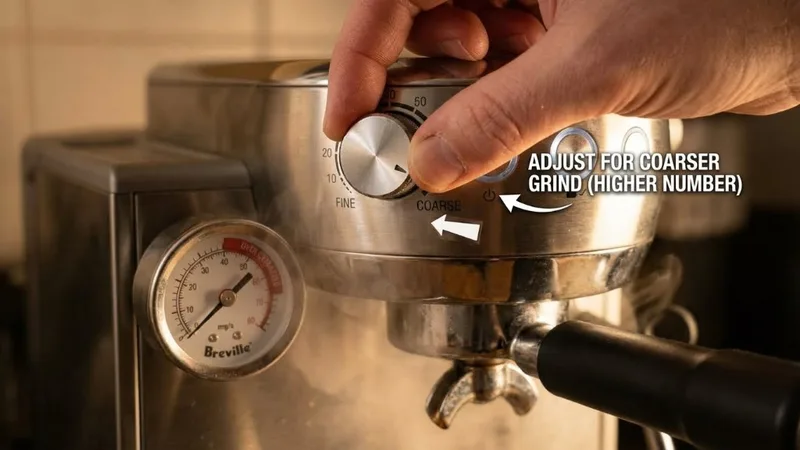
Step 1: Coarsen Your Grind
Start here. Seriously. This fixes the problem most of the time.
- Move the grind dial 1-2 clicks coarser (higher number on Breville)
- Only adjust while the grinder’s actually running—I cannot stress this enough
- Purge 2-3g of old grounds (they’re still the finer setting)
- Pull your test shot and watch the gauge
- Still choking? Go another click coarser. Getting better? You’re on the right track
Step 2: Reduce Your Dose

If grinding coarser didn’t fully solve it, dose might be the issue. Here’s what I did when changing grind alone wasn’t enough:
- Actually weigh your current dose (you might be surprised)
- Drop it by 1-2 grams
- For double basket: shoot for 17g instead of 19g
- Test again and see what the gauge does
I dropped from 19.5g to 17g last week and the difference was night and day. Gauge sat right in the middle of the zone.
Step 3: Lighten Your Tamp
- Press firmly but don’t put your weight into it
- Concentrate on keeping everything level
- A slight polish twist at the end is fine
- Don’t treat it like you’re trying to compress diamonds
Step 4: Improve Distribution
Before you even think about tamping:
- Grab a WDT tool and stir through those grounds—break up any clumps
- Gentle tap on the counter to settle everything
- Distribution tool helps if you have one
- Look for obvious gaps or uneven areas
Step 5: Run Diagnostic Tests
Not sure if it’s you or the machine? Here’s how to find out:
Blind basket test:
- Put the rubber cleaning disc in
- Lock the portafilter
- Hit the shot button
- Gauge should max out (that’s normal—there’s no flow possible)
If gauge doesn’t max with blank disc: Something’s wrong with the machine itself
If it maxes with blank but runs high with coffee: Your puck prep needs work
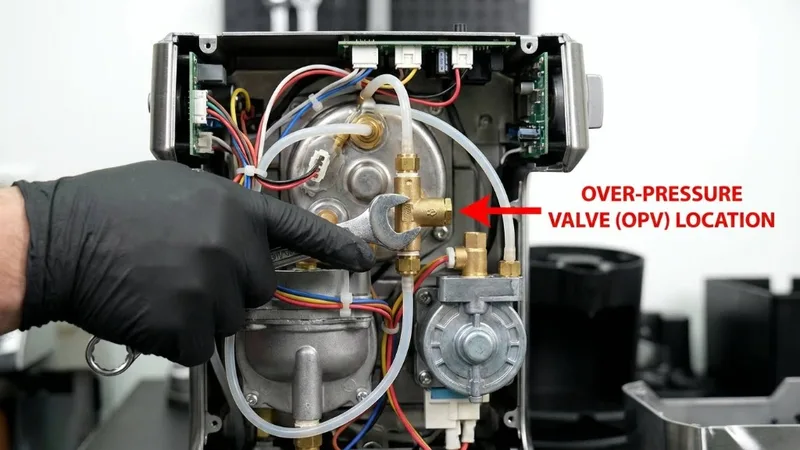
Advanced: OPV Adjustment
Here’s something most beginner guides skip: your Breville probably came from the factory set at 12-15 bars. Way higher than the 9 bars you actually want for good espresso. The Over-Pressure Valve (OPV) controls this, and yes, you can adjust it.
Should You Adjust Your OPV?
Worth considering if:
- You’ve already dialed in grind, dose, and technique
- Gauge still reads high even when shots taste reasonable
- You want that extra level of control
Skip it if:
- You’re still learning (master the basics first)
- Machine’s under warranty (this could void it)
- You’re not comfortable opening up appliances
I waited about 8 months before touching my OPV. Wanted to make sure I knew what good extraction felt like before messing with the internals.
OPV Adjustment Overview
Fair warning: This means cracking open your machine. Research your specific model thoroughly—watch at least 2-3 YouTube walkthroughs before you start.
- Unplug everything and let it cool completely (give it a few hours)
- Remove the outer casing (usually screws on bottom and back)
- Find the OPV—it’s near the pump with an adjustable spring mechanism
- Turn the adjustment screw to bring pressure down
- Put it back together and test with the blind basket
- You’re aiming for 9-10 bars reading with the blank disc
Seriously though, watch multiple tutorials specific to your exact model. I learned a lot from the coffee forums and YouTube deep dives before I felt confident enough to do this.
Prevention Tips
Once you’ve fixed the problem, here’s how to keep your pressure dialed in:
Dial-In Process
- Start coarse, work finer—I begin around setting 8-9 and work down until I hit that 25-30 second window
- Change one thing at a time—adjust grind OR dose, never both at once, or you won’t know what helped
- Write it down—I keep notes on my phone for each bag I buy
- Embrace the sacrifice shots—the first 2-3 shots with new beans are just calibration. Accept it
Consistent Technique
- Weigh your dose every single time (18g ± 0.5g is my target)
- Same distribution routine for every shot
- Same tamping motion, same pressure
- Lock and brew immediately—don’t let the puck sit in a hot group head
Maintenance
- Weekly: Run that backflush cycle with cleaning tablets
- Monthly: Descale—more often if you’ve got hard water
- Every few months: Check your gaskets and seals for wear
I skip maintenance occasionally when life gets busy, and I always pay for it with inconsistent shots. Don’t be like me.
Bean Management
- Let beans rest 5-14 days post-roast for the smoothest extraction
- Airtight container, away from sunlight and heat
- Grind coarser for really fresh beans (still degassing)
- Grind finer as beans age (they extract easier over time)
FAQs
My gauge maxes out with the pressurized basket—is my machine broken?
Nope, you’re good. Those pressurized (double-wall) baskets work completely differently. Weird and variable gauge readings are normal with them. If you want to actually diagnose pressure issues, switch to a single-wall basket.
My shot flows fast but gauge shows high pressure—what’s happening?
Classic channeling situation. Your OPV is probably dumping pressure at 12-15 bar while water blasts through the weak spots in your puck. Go coarser on the grind and work on your distribution. I dealt with this for weeks before I figured out what was going on.
Is it safe to ignore high pressure if the shot tastes okay?
I wouldn’t. Running at high pressure consistently puts stress on your machine’s internals. And honestly? What you think tastes “okay” right now probably isn’t as good as it could be. Dial it in properly and you’ll taste the difference.
What’s the best grind setting for Breville Barista Express?
I usually start around 5-7 for medium roasts, but every bean is different. The real answer: whatever setting gives you 25-30 second extraction time. I’ve had bags that needed a 4 and others that worked better at 8. Just gotta test.
The pressure drops mid-shot—is that related to high pressure?
Different issue, actually. Mid-shot pressure drops usually mean channeling—water found a weak spot in the puck and broke through. Work on your distribution and puck prep rather than worrying about the initial pressure reading.
Key Takeaways
- Gauge reading >10 bar = over-extraction—usually from too fine a grind, too much coffee, or tamping like you’re angry at it
- Fix in this order: Grind coarser (1 notch) → Drop dose by 2g → Lighter tamp → Better distribution → OPV adjustment only as last resort
- Target numbers: 9 bars on gauge, 25-30 seconds extraction, 1:2 ratio (18g coffee → 36g liquid)
- Boring consistency beats cool modifications—same technique plus regular cleaning gets you further than any upgrade
- Test methodically: Blank basket test confirms machine works; puck analysis shows prep problems
Look, I’ve wasted more beans than I care to count figuring this stuff out. But once you nail your settings? Every morning starts with a genuinely good shot. Small adjustments, patience, and that perfect pressure is closer than you think.
Related Guides:
Mikael
Home espresso enthusiast and Breville specialist. Helping you master the art of coffee brewing from your own kitchen.
Learn more about me →